Springtime Graduation Floral Cake
Highlighted under: Spring Recipes
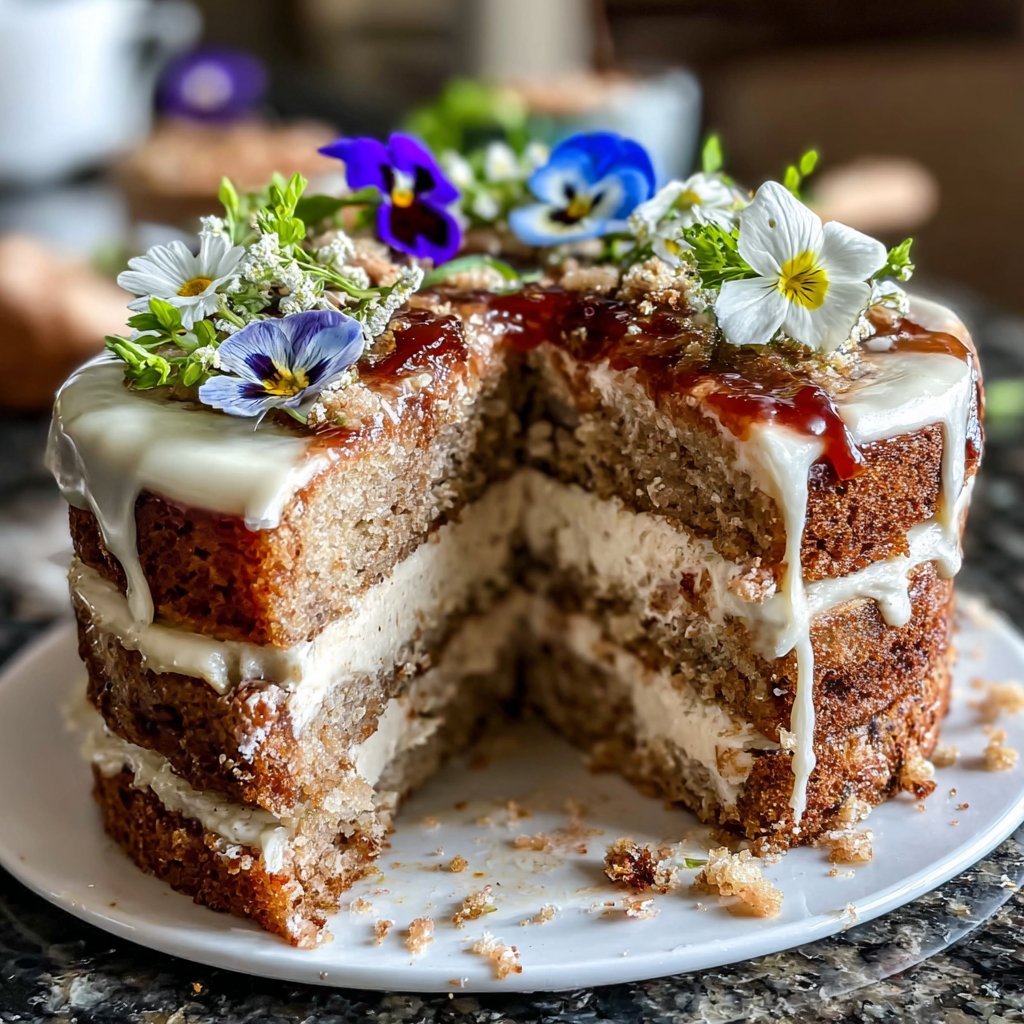
I absolutely love creating cakes that not only taste amazing but also look stunning. The Springtime Graduation Floral Cake elevates any celebration with its delicate florals and refreshing flavors. Every time I make this cake, it reminds me of sunny days and joyful moments. The combination of light sponge, fragrant whipped cream, and colorful edible flowers makes it a perfect centerpiece for graduation parties. I can’t wait to share this recipe, so you can experience the joy of baking this delightful cake for your loved ones!
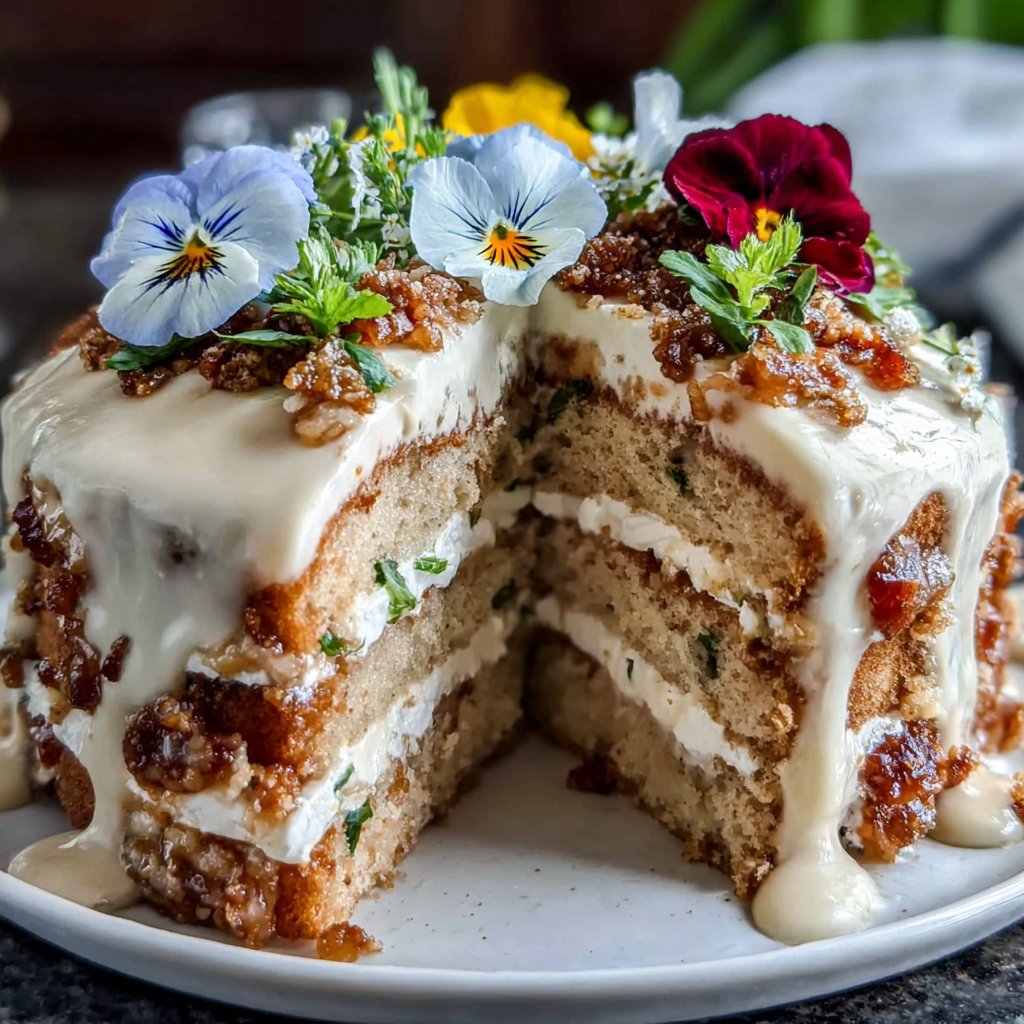
When I first crafted the Springtime Graduation Floral Cake, I was inspired by the blooming flowers of the season. I wanted to incorporate the freshness of spring into a cake that would be memorable for any graduation celebration. The vibrant colors of the edible flowers contrast beautifully with the fluffy white cake, creating an eye-catching dessert that tastes as good as it looks.
Through experimentation, I discovered that using whipped cream not only adds a delightful texture but also allows the flavors of the flowers to shine through. I recommend sourcing the freshest ingredients to enhance the cake’s overall taste. Trust me; this cake will become a favorite at any spring gathering!
Why You'll Love This Cake
- A stunning centerpiece that captures the beauty of spring
- Light and fluffy texture paired with refreshing floral notes
- Easily customizable with your favorite edible flowers
Mastering the Sponge Cake
Creating a light and fluffy sponge cake is all about the creaming method. Make sure to cream the softened butter and granulated sugar until pale and fluffy—this usually takes about 4 to 5 minutes using an electric mixer. The air incorporated during this step is crucial as it will help your cake rise beautifully in the oven. Be patient; don’t rush through this process!
When incorporating the eggs, add them one at a time. This allows each egg to fully blend into the batter, ensuring a stable structure. If your batter looks curdled at any point, don’t worry! A gentle mix after adding the flour will help bring everything back together. Just remember to avoid overmixing once the flour is in, as that can lead to a denser cake.
Making the Perfect Whipped Cream Frosting
Whipping the cream to the right consistency is essential for achieving a light and airy frosting. Start with very cold heavy whipping cream; this will help it whip to soft peaks more easily. I often chill my mixing bowl and beaters beforehand for an added boost. Once you see soft peaks forming, you’re there. This typically takes around 3 to 5 minutes of mixing on medium speed.
If you find your cream isn’t thickening as expected, double-check that you’re using heavy whipping cream and not regular cream, as the latter has a lower fat content. Additionally, avoid overwhipping; it's an easy mistake that can turn your dreamy frosting into butter! If you happen to overwhip, try folding in a bit of fresh cream to balance it out.
Decorating and Serving Tips
When it comes to decorating your cake with edible flowers, consider pairing colors that complement both the cake and the frosting. Fresh flowers like pansies and violets not only look beautiful but also add a touch of flavor that aligns well with the cake's lightness. Place the flowers strategically so that they draw the eye and enhance the visual appeal of your creation.
Serving suggestions include pairing this cake with fresh fruit slices, which add a pop of color and a refreshing tartness that balances the sweetness of the frosting. If you wish to make this cake in advance, it’s best to store it in the refrigerator for freshness, but keep in mind that the whipped cream is best enjoyed fresh. You can always assemble the cake the day of the event for optimal texture and taste.
Ingredients
Cake Ingredients
- 2 cups all-purpose flour
- 1 1/2 cups granulated sugar
- 1/2 cup unsalted butter, softened
- 1 cup milk
- 3 large eggs
- 2 teaspoons baking powder
- 1 teaspoon vanilla extract
- 1/2 teaspoon salt
Whipped Cream Frosting Ingredients
- 2 cups heavy whipping cream
- 1/2 cup powdered sugar
- 1 teaspoon vanilla extract
Decorative Ingredients
- Edible flowers (like pansies, violets, or nasturtiums)
- Fresh fruit slices (optional)
Instructions
Prepare the Cake Batter
Preheat your oven to 350°F (175°C) and grease two 9-inch round cake pans. In a large mixing bowl, cream together the softened butter and granulated sugar until light and fluffy. Add the eggs one at a time, mixing well after each addition. Stir in the vanilla extract. In another bowl, whisk together the flour, baking powder, and salt. Gradually add the dry ingredients to the wet mixture, alternating with the milk until everything is combined.
Bake the Cakes
Pour the batter evenly into the prepared cake pans. Bake in the preheated oven for about 25–30 minutes, or until a toothpick inserted into the center comes out clean. Once baked, let the cakes cool in the pans for 10 minutes before transferring them to wire racks to cool completely.
Prepare the Whipped Cream Frosting
In a large mixing bowl, beat the heavy whipping cream, powdered sugar, and vanilla extract together until soft peaks form. Be cautious not to overwhip, or the cream will turn into butter!
Assemble the Cake
Once the cakes are completely cooled, place one layer on a serving plate. Spread a generous amount of whipped cream frosting on top, followed by the second layer of cake. Frost the top and sides of the cake with the remaining whipped cream.
Decorate with Flowers
Decorate the top of the cake with your choice of edible flowers and fresh fruit slices if desired. Chill the cake in the refrigerator for about 30 minutes to set the frosting before serving. Enjoy!
Pro Tips
- For the best results, use high-quality ingredients and fresh flowers. Experiment with different flavors by adding lemon zest to the cake batter for an extra zing.
Ingredient Substitution Ideas
For those with dietary restrictions, substituting all-purpose flour with a gluten-free mix can yield great results, ensuring everyone can enjoy this festive cake. Be sure to select a gluten-free flour blend designed for baking to maintain the cake's structure and texture. Similarly, to make this cake dairy-free, use coconut milk in place of cow's milk and substitute the butter with a dairy-free spread.
If you want to lower the sugar content, consider using a natural sweetener like honey or maple syrup in a reduced quantity. Just keep in mind that these alternatives can add moisture, so you may need to slightly adjust the amount of flour to keep the batter's consistency consistent.
Storage and Freezing
After you've baked and cooled the cake, it can be stored in an airtight container in the refrigerator for up to three days. However, deterioration in the whipped cream frosting can begin after a day, so for best results, frost it on the day you plan to serve. If you anticipate leftovers or wish to prepare ahead, consider freezing the un-frosted cake layers, wrapped tightly in plastic wrap.
To freeze your cake layers, allow them to cool completely, then wrap them individually in plastic wrap followed by aluminum foil to prevent freezer burn. You can safely store them in the freezer for up to 3 months. When ready to serve, thaw them in the refrigerator overnight before frosting and decorating. This will ensure the sponge retains its desirable texture.
Scaling the Recipe
If you're hosting a larger gathering, it’s simple to scale up this recipe. For three 9-inch layers, just multiply the ingredients by 1.5 and follow the same procedure. Likewise, if you need to reduce portions for a smaller celebration, you can halve the ingredient amounts and use smaller cake pans, such as 6-inch rounds, to maintain the same height and texture.
Feel free to experiment with layering the cake using different flavors of whipped cream; adding citrus zest or a splash of floral syrup can elevate the taste while sticking to the basic structure of the frosting. By adjusting flavors and sizes, you can create a custom cake that fits perfectly with the occasion.
Questions About Recipes
→ Can I make this cake ahead of time?
Yes, you can bake the cakes a day in advance and frost them on the day of your event for the best texture.
→ What kind of edible flowers can I use?
You can use various edible flowers like pansies, violets, or nasturtiums. Just ensure they are pesticide-free.
→ How should I store leftover cake?
Store any leftover cake in an airtight container in the refrigerator. It should stay fresh for up to three days.
→ Can I substitute the whipping cream frosting?
Absolutely! You can use cream cheese frosting or whipped coconut cream as alternatives.
Springtime Graduation Floral Cake
Created by: The Chefianfoods Team
Recipe Type: Spring Recipes
Skill Level: Intermediate
Final Quantity: 8 servings
What You'll Need
Cake Ingredients
- 2 cups all-purpose flour
- 1 1/2 cups granulated sugar
- 1/2 cup unsalted butter, softened
- 1 cup milk
- 3 large eggs
- 2 teaspoons baking powder
- 1 teaspoon vanilla extract
- 1/2 teaspoon salt
Whipped Cream Frosting Ingredients
- 2 cups heavy whipping cream
- 1/2 cup powdered sugar
- 1 teaspoon vanilla extract
Decorative Ingredients
- Edible flowers (like pansies, violets, or nasturtiums)
- Fresh fruit slices (optional)
How-To Steps
Preheat your oven to 350°F (175°C) and grease two 9-inch round cake pans. In a large mixing bowl, cream together the softened butter and granulated sugar until light and fluffy. Add the eggs one at a time, mixing well after each addition. Stir in the vanilla extract. In another bowl, whisk together the flour, baking powder, and salt. Gradually add the dry ingredients to the wet mixture, alternating with the milk until everything is combined.
Pour the batter evenly into the prepared cake pans. Bake in the preheated oven for about 25–30 minutes, or until a toothpick inserted into the center comes out clean. Once baked, let the cakes cool in the pans for 10 minutes before transferring them to wire racks to cool completely.
In a large mixing bowl, beat the heavy whipping cream, powdered sugar, and vanilla extract together until soft peaks form. Be cautious not to overwhip, or the cream will turn into butter!
Once the cakes are completely cooled, place one layer on a serving plate. Spread a generous amount of whipped cream frosting on top, followed by the second layer of cake. Frost the top and sides of the cake with the remaining whipped cream.
Decorate the top of the cake with your choice of edible flowers and fresh fruit slices if desired. Chill the cake in the refrigerator for about 30 minutes to set the frosting before serving. Enjoy!
Extra Tips
- For the best results, use high-quality ingredients and fresh flowers. Experiment with different flavors by adding lemon zest to the cake batter for an extra zing.
Nutritional Breakdown (Per Serving)
- Calories: 320 kcal
- Total Fat: 24g
- Saturated Fat: 15g
- Cholesterol: 110mg
- Sodium: 135mg
- Total Carbohydrates: 34g
- Dietary Fiber: 1g
- Sugars: 22g
- Protein: 4g